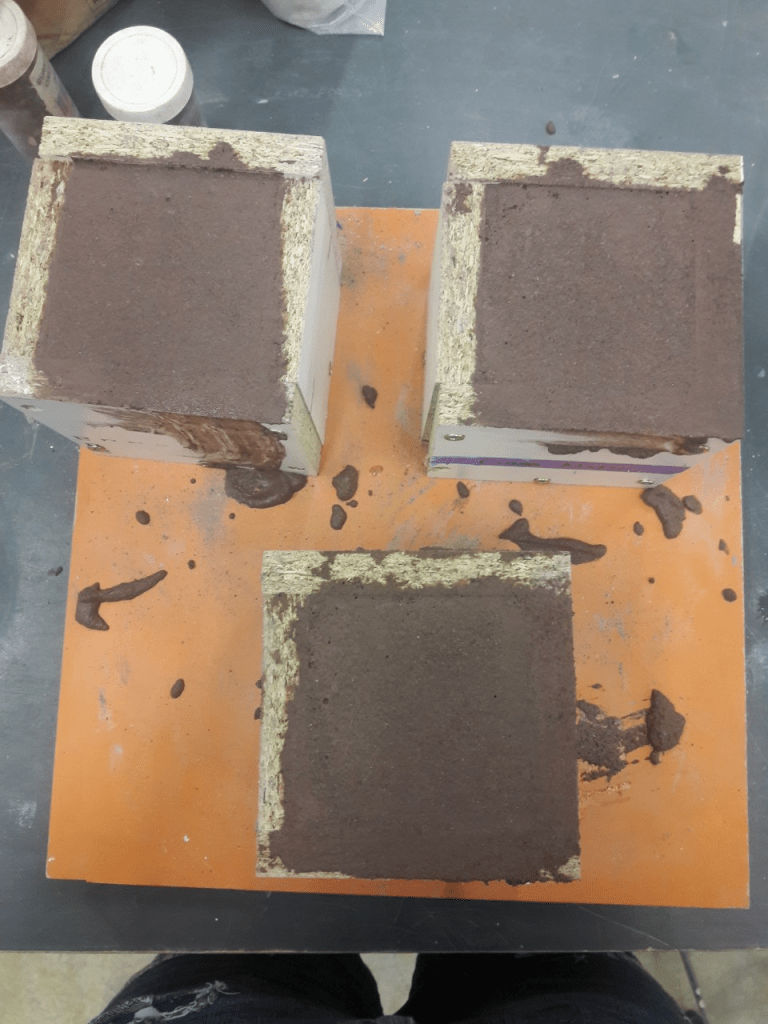
This week I removed my concrete cube samples from their cottles. One did chip and another did break but luckily I still have one that is perfect.
Category: Uncategorized


Week 12: Concrete Cube Continued
This week I put in my final layer of concrete for my material sample. Here are some images of the cube as it is being made.


Week 12: Rhino Model and Section
This week I finished my digital Rhino model and from this I took my section and inalised my floor plan. Here are some of the perspective renderings I took of my model from Rhino:
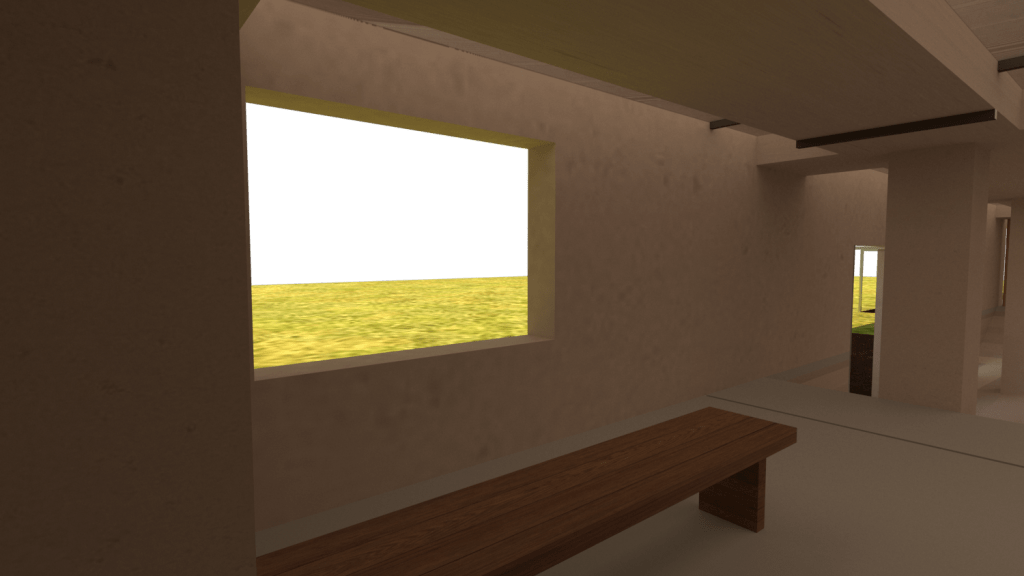
Bench Looking out to Forest 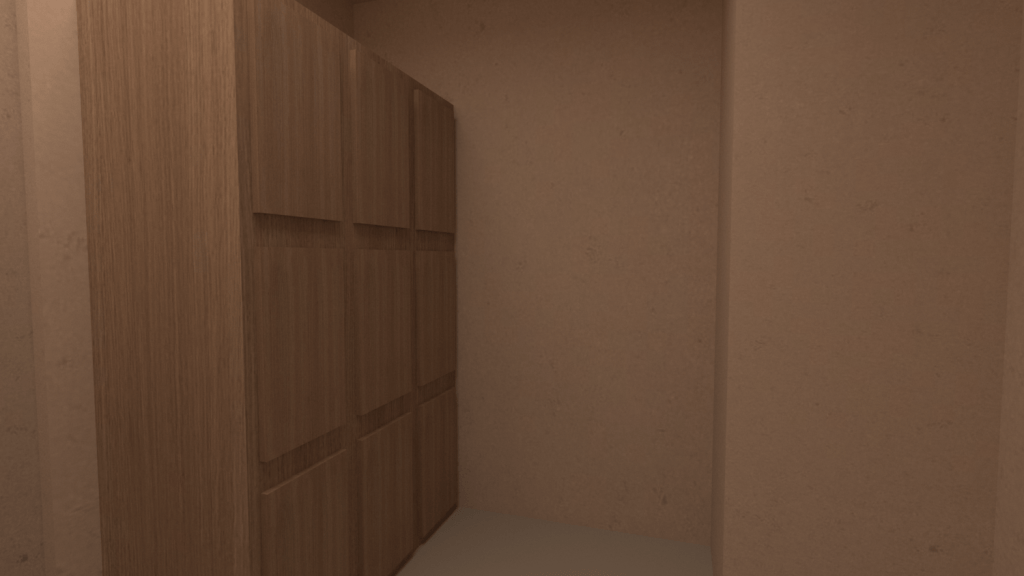
Changing Area 
Entering Bath House 
Mount St Entrance 
Heated Bath 
Main Bath 1 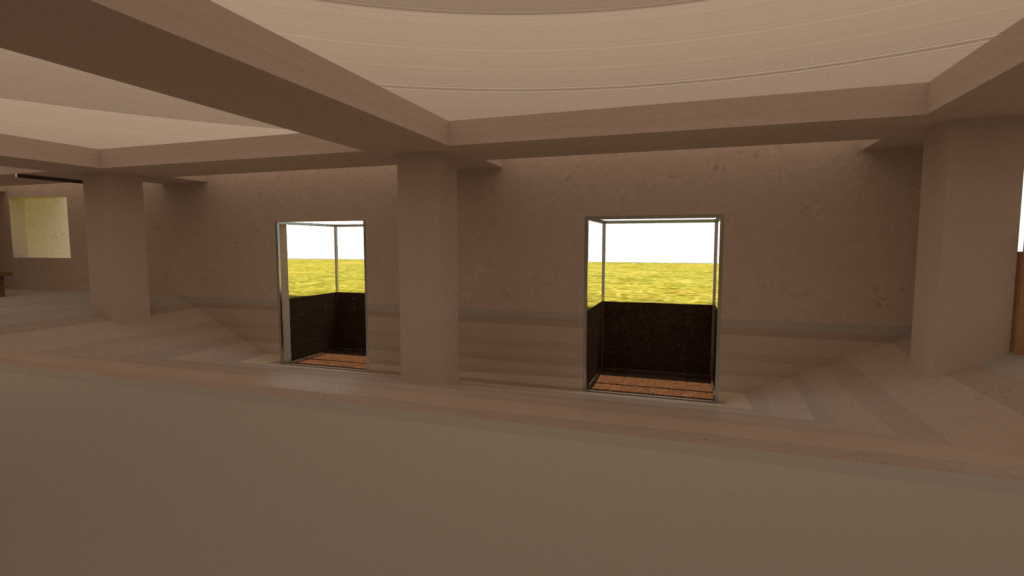
Main Bath 2 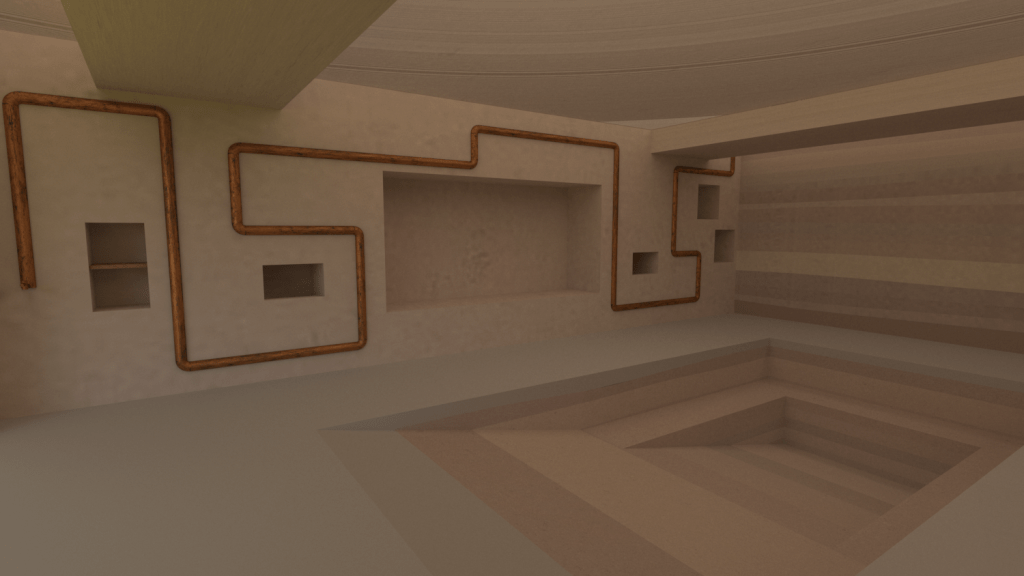
Refreshment Area
From here I will be able to use Photoshop to alter and manipulate these images to create the affect and atmosphere I desire.
Week 12: South Wall Feature
This week I finalized my whole bath house design. The last thing to add was the south wall design. I chose not to put windows along this wall because I want occupants to be immersed in the forest and inserting windows along this wall breaks and disjoints this idea as it opens the space up more to Mount St and the city.
This wall was blank with nothing on it and it brought the atmosphere of the space down. I wanted to create a feature wall for this space but I didn’t want t to be too overpowering and I wanted it to work harmoniously with the rest of the space.
My aim ids to create an immersed space and I decided that by extending my flooring feature up the south wall, I could intensify this concept. This is why I decided to have a layered concrete affect all along the interior of the south wall.
Week 11: Concrete Cube
I decided that to best describe my flooring feature in my presentation, I would create a material sample myself. I plan to create a concrete cube consisting of different colours of layered concrete to create the affect I desire. I coloured the concrete with concrete dyes. This week I began the process by making the cottle for the cube and starting with the first layer.

I made three cottles to allow room for error. I one fails, I still have two more I can fall back on.

Concrete Prior to Adding Water 
Dark Brown Concrete Dye 
Burnt Umber Oxide Concrete Dye
I used a combination of the two colours (above) to create a shift in colour from each layer.

I will be able to put the next layer of concrete in once this layer has dried enough.
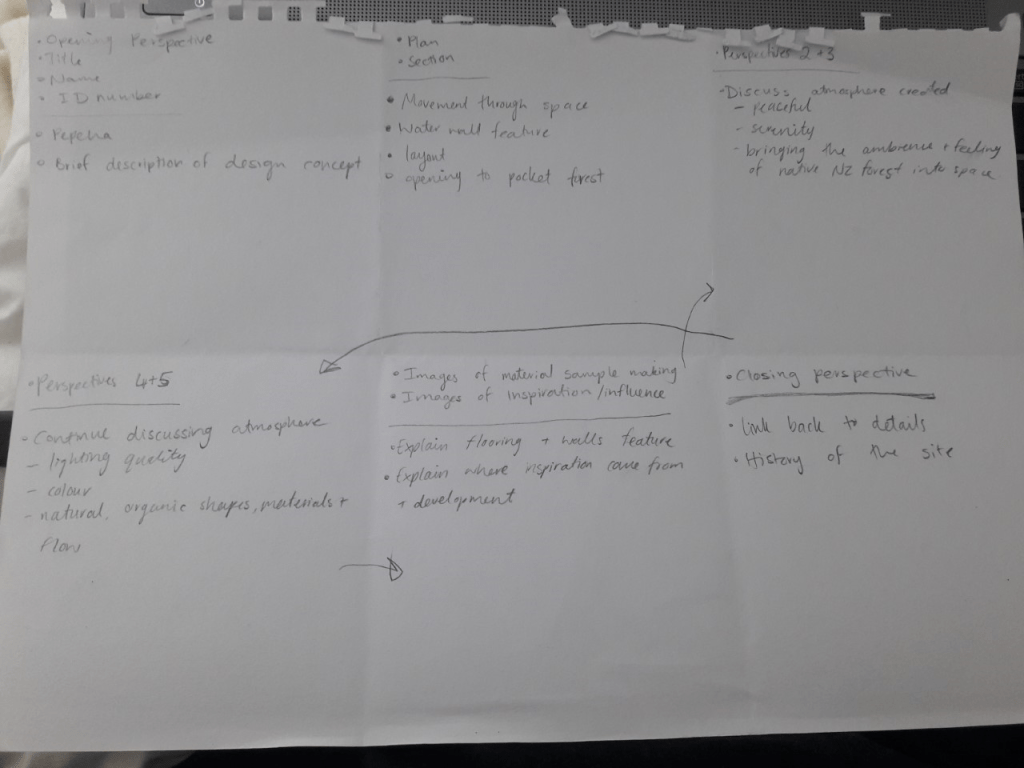
Week 11: Presentation Plan
This week I created a plan for my presentation in Week 14 to give me a clear idea of what I need to fix up, finalize and finish before the end of semester. It helped me regroup my thoughts and give me more direction. This is the plan I put together:
Week 10: East Wall and Refreshment Area Finalization
This week I finalized and solved the problems I was facing with my refreshment area and the far end of the basement. I was really struggling with design with the rounded columns and utilizing the space the best way possible. I was also unsure of where to position my refreshment area concept. I cam up with the idea to produce a fake wall at the far end of the space and create cubby holes as storage and a dry seating area. With this I was able to place my refreshment area idea on this fake wall with the cubbies and keep the flow and unity of the space. This design also allowed me to include another bath, this one heated, as I had space and had already provided a dry seating area.

Stage 1 – Initial Concept 
Stage 2 – Development 
Stage 3 – Final Design
I had explored previously in my initial concepts both dry and wet seating areas but this design allows me to do both without crowding the space. I did want a space where occupants could sit and look into the forest through the opening and the smaller, heated, seated bath allows this. It is also in the ground so the experience of this bath is more immersive in the context of the forest.
For the piping in the refreshment area, I have decided to use copper. I feel that this gives off a more natural, organic finish and, because the piping is a large design feature, it also allows it to stand out. After some research, I also found out that 90% of copper is recyclable which is an important point in the sense that my design is considerate of the surrounding environmental impacts. I want the piping to be made from recycled copper to create that further link between the integration of urban and nature.
Week 10: Human Factor
This week we looked at the human factor and how to give context to an image using people and details such as the edge condition of our baths. We did an exercise around drawing our classmates along an edge condition. These are my drawings:


Week 9: Flooring Materiality
I really wanted to explore my concept further through materiality. I wanted the space to integrate outside and nature with the inside urban space and I wanted the design to be immersive for the occupants of the bath house.
Recently on a walk to the beach, I found some amazing rock forms that boldly exposed their layering and time encapsulation of their formation (below).


This natural layering reminded me of a story I recently watched on Seven Sharp about a Centre being built in Kawakawa as a tribute to Friedensreich Hundertwasser, an artist and architect well known for his public toilet design in the small Northland Town. One of the main features of this building that has already been made is the rammed earth walls which create a series of organic and vibrant exposed layers (Story available at https://www.tvnz.co.nz/one-news/new-zealand/small-northland-town-unveils-new-buildings-in-tribute-architect-friedensreich-hundertwasser). These walls inspired me to take a similar approach in my design but in concrete form and as a flooring feature. Because my pool cut into the floor, The layers are exposed in these parts, creating an immersive sense for occupants entering the bath.
From here I did some sketches to show how this concept would work in my design and how i would show it in different views. Because this is a large and main design feature in the space, I wanted to demonstrate and explore it well.


Week 9: Wooden Barrier
This week I designed a wooden pole barrier separating the bath from the entry into the pocket forest. The reason why I decided to design a barrier was because I didn’t want leaves and other natural debris blowing into the bath. Also, the barrier helps in creating a sense of division as the space is quite open.
I decided to use slats rather than one solid surface to continue the theme of manipulating thresholds and barriers to create integration between two opposite worlds. These are the concepts I explored:

Design 1 
Design 2
I decided on my second design as the first one feels more constrictive and enclosing whereas the second design coming from the floor as apposed to the ceiling creates a better sense of openness. This is important as the space is a low lying basement and needs to be opened up as much as possible.
I decided to give a variation in the height of the poles to create a more organic feel and less clinical. It also creates a better flow into the space from the pocket forest.
